
Warning: Cannot modify header information - headers already sent in /home/u278635817/domains/mymorninglife.com/public_html/wp-content/plugins/artigosgpt/artigosgpt.php on line 29509
Warning: Cannot modify header information - headers already sent in /home/u278635817/domains/mymorninglife.com/public_html/wp-content/plugins/artigosgpt/artigosgpt.php on line 29509
The skyline hits you differently from Queens — broader, calmer, like Manhattan unplugged. If you want epic Manhattan shots without the crush of tourists, these Queens viewpoints are where photographers and locals quietly win. Queens viewpoints deliver wide angles, dramatic light, and transit-friendly access. Read this like a friend pointing at the best windows in the city: quick tips, exact spots, when to go, and what to avoid so your photos look like postcards rather than phone snaps.
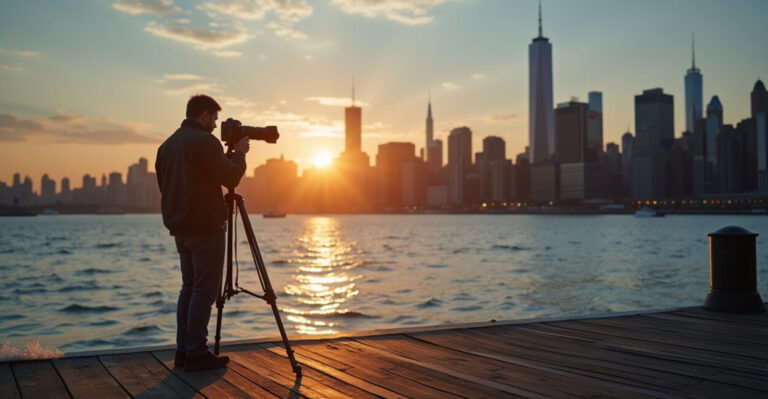
Astoria Park: Sunrise with a Riverside Edge
Astoria Park gives you a sweeping Manhattan silhouette with a river in the foreground — and it’s rarely packed at dawn. The East River acts like a natural reflector in the morning light, pulling warm tones into your frame. Walk north along the water for varying compositions: bridge spans, tree-lined banks, or the park’s pool for foreground interest. Transit: N/Q to Astoria Boulevard or MTA bus lines that stop near Ditmars. Best hour: 30–40 minutes before sunrise to capture pre-dawn blues and warm city highlights.
Gantry Plaza State Park: The Iconic Jetéé Without the Crowd at Dusk
Gantry feels like a museum for skyline lovers — but with benches and pizzas, not exhibits. The view centers the United Nations and midtown, making a bold, postcard-ready composition. Expect a golden hour glow that hits the façade of Midtown towers. Get there 20–30 minutes before sunset to secure a spot on the piers. Take the 7 train to Vernon Boulevard–Jackson Avenue. Pro tip: use the park’s industrial cranes as foreground anchors; they turn a standard skyline shot into something cinematic.
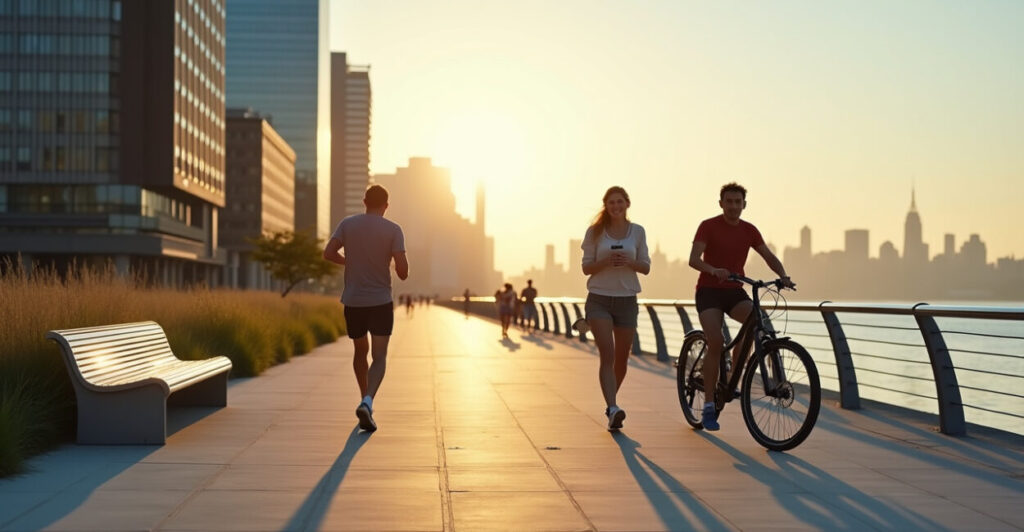
Hunter’s Point South: Clean Lines and Modern Frames
Hunter’s Point South is minimal and modern, which makes it perfect for clean, graphic Manhattan shots. The promenade’s wide paths and low railings let you frame with negative space and leading lines. It’s great for sunset and blue hour because the newer buildings in Long Island City reflect light differently than Midtown glass. Expect joggers and commuters, but not tourists. Travel: 7 train to Court Square or Vernon Boulevard, then a short walk. Composition tip: include a stretch of the promenade to give scale and depth.
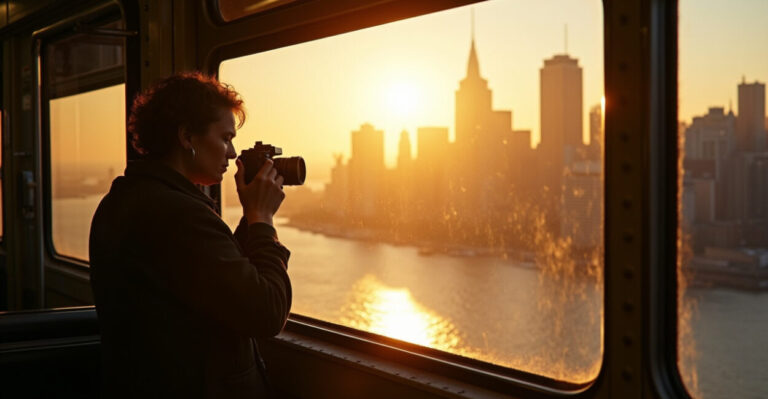
The Roosevelt Island Tramway: Moving Views, Fixed Impact
The tram gives you a changing panorama — and the cable car’s curve makes unusual perspectives easy to get. Unlike a static park, the tram moves, so you can shoot multiple angles in one ride. Aim for mid-ride when Manhattan fills the window and the East River frames the shot. It’s transit-friendly: take the F to Roosevelt Island or the tram from Manhattan’s 59th Street. Expect reflections on the window; press the lens close to glass or use a polarizer to cut glare and boost contrast.
Sunnyside Gardens Rooflines: Local Charm Meets Midtown Drama
Some of the best Manhattan views appear from unexpected neighborhood edges — Sunnyside Gardens is one of them. Quiet streets, low buildings, and vantage points with chimneys and water towers create foreground texture few visitors think to use. The contrast between quaint residential rooftops and the distant skyline makes for intimate, storytelling images. Walk the blocks near Skillman Avenue in late afternoon for soft side light. Avoid busy thoroughfares; the best frames come from small sidewalks and pocket parks.
Edgewater Park (Hallets Cove): The Under-the-Radar Long Shot
Hallets Cove is the long-lens option: get a compressed, detailed Manhattan without elbow-to-elbow spectators. This spot rewards telephoto lenses; buildings stack tightly, and reflections pop in the river. It’s perfect on a clear day when you want crisp lines and bold contrast. Take the M/R to 103rd Street or nearby buses, then walk west toward the water. Composition-wise, look for boats or pilings to add a foreground punctuation mark that leads the eye into the city.
What Photographers Get Wrong (and How to Fix It)
Most mistakes are easy to spot: wrong hour, cluttered foreground, or trying to copy the same shot as everyone else. Common errors:
- Arriving at golden hour and shooting straight into the sun — backlight without a plan.
- Using too-wide a lens and ignoring foreground interest.
- Picking busy weekend times that flatten light and increase strangers in your frame.
Comparison: Many imagine Manhattan views only from Brooklyn Bridge Park. Reality: Queens viewpoints often offer wider angles, fewer people, and equally dramatic light. That quieter environment translates to bolder, cleaner photos that stand out in feeds.
Mini-story: I once skipped a popular Brooklyn spot for Gantry on a gray evening. The skyline broke into gold for five minutes, and I walked away with three frames that got more reactions than a whole weekend’s set from the bridge. It wasn’t luck — it was choosing the quieter view and waiting for the moment.
Authority note: For transit times and service changes, check MTA service updates. For park hours and permits, consult NYC Parks.
Before you go: pack a small tripod, a 24–70 for versatility and a 70–200 for compressed skyline shots, and a polarizer. Go early, leave space for local people, and trade one iconic angle for two original ones.
One question to leave you with: which quiet view will you try first — the minimal lines of Hunter’s Point or the cinematic cranes of Gantry?
Where Are the Best Access Points and Transit Options for These Queens Viewpoints?
Most spots are transit-friendly: Astoria Park (N/Q to Astoria Boulevard), Gantry Plaza (7 to Vernon Boulevard–Jackson Avenue), Hunter’s Point South (7 to Court Square), and Roosevelt Island Tram (F train or tram from 59th Street). Sunnyside and Hallets Cove require short walks from local subway or bus stops. Always check the MTA for service changes before heading out, especially on weekends or late nights. Walking a few blocks often reveals better angles than shooting from the first spot you find.
What Time of Day Should I Aim for to Get Postcard-quality Light?
Golden hour and blue hour are your best bets. For east-facing views like Astoria Park, shoot sunrise to capture soft warm light. West-facing spots and long lenses do well near sunset and twilight when city lights start to pop. Blue hour—about 20–40 minutes after sunset—gives a rich sky and balanced exposure between buildings and artificial lights. Arrive early to scout compositions and avoid last-minute scrambling; it’s the prep that makes the brief window count.
Which Lenses and Settings Work Best for Queens Skyline Photos?
A 24–70mm covers most needs: wide for context, tight for detail. Bring a 70–200mm if you want compressed, layered skyline shots. Use a tripod for blue hour to keep ISO low. Shoot RAW for better highlight and shadow recovery. Settings example: aperture f/8–f/11 for sharpness, shutter speed to match light (longer at dusk), ISO 100–400. A polarizer helps manage reflections on the river during day shots, while lens hoods reduce flare when shooting toward the sun.
Are Permits Needed for Photographing in These Queens Viewpoints?
For casual photography, no permit is usually required in public parks and promenades. However, commercial shoots, professional setups with lights, or large tripods may need permits from NYC Parks. If you plan to fly a drone, follow FAA rules and local restrictions—New York City generally prohibits recreational drone use over the city and parks. When in doubt, check park regulations or contact authorities to avoid fines or equipment confiscation.
How Can I Avoid Crowds and Still Get a Lively Skyline Shot?
Choose off-peak times: weekdays at sunrise or late evening beat the crowds. Scout locations on a map and find adjacent, less obvious spots — side piers, pocket parks, or quiet streets. Use tighter compositions that exclude people or include them as scale rather than the subject. Arrive early to set up and be ready for shifting light. If a location is busy, walk a few blocks up or down the river; perspective changes fast and often yields the unique frame you want.