


Imagine warm light wrapping a shoreline in cinematic hues—this is the power of golden hour. The golden hour transforms everyday scenes into dramatic, saturated photographs and films, and it’s essential for craft-driven creators seeking emotive color and contrast.
Today, photographers and travelers chase golden hour for its soft shadows, rich color grading, and that fleeting magic light at dawn or dusk. This guide explores techniques, gear, and the best St. Lucia beaches to capture warm, cinematic tones with saturated skies.
Read on to learn practical shooting steps, composition tips, dawn routines, and location notes so you can arrive ready to photograph the golden hour like a pro—more contrast, deeper color, stronger stories.
Why Golden Hour Transforms Mood and Color
Light Quality and Emotional Impact
Golden hour produces low-angle sunlight that creates warm tones, soft shadows, and three-dimensional depth in portraits and landscapes. It intensifies skin tones and highlights texture.
That warm color temperature—and the way it backlights subjects—evokes nostalgia, intimacy, and cinematic drama that flat midday light rarely achieves.
Color Saturation and Contrast Changes
When sunlight traverses more atmosphere, blues deepen and reds intensify, boosting saturation in skies and water. The result is punchy, filmic color without heavy post-processing.
Contrast becomes directional: long shadows and rim light separate subjects from backgrounds, yielding crisp silhouettes and glowing outlines.
Essential Gear and Settings for Golden Hour
Camera, Lenses, and Stabilisation
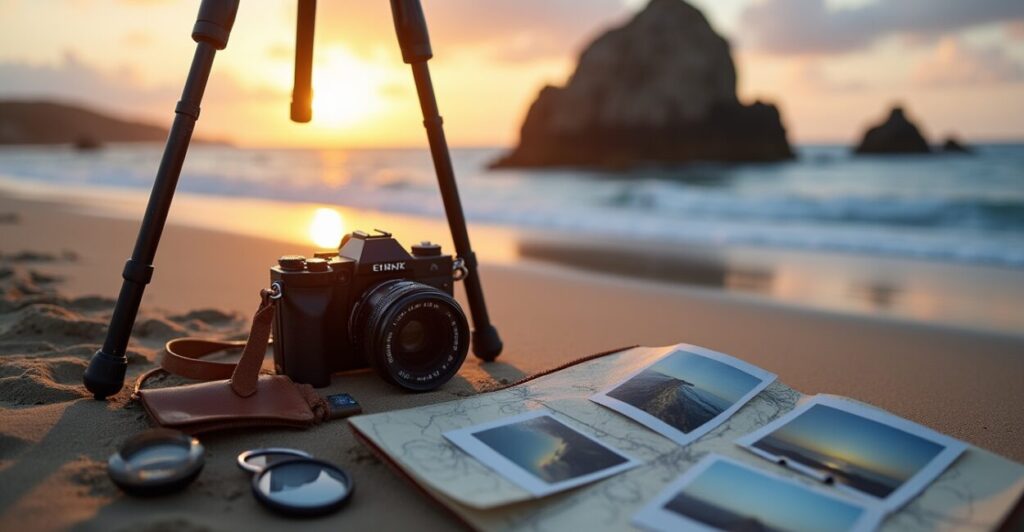
Use a fast prime for low light and creamy bokeh, or a wide-angle to capture skies and foreground drama. Bring a tripod for long exposures at dawn or dusk.
Neutral density filters and a polariser help control highlights and deepen skies, while a reliable remote shutter ensures sharp frames during long exposures.
Exposure, White Balance, and Framing
Shoot RAW and set white balance to daylight or a warm preset to preserve golden hues. Underexpose slightly to keep highlights rich and saturated.
Compose with backlight or side light to emphasize texture and silhouette, and bracket exposures when dynamic range is high for later blending.
Composing Cinematic Beach Images at Dawn
Foreground, Midground, and Horizon
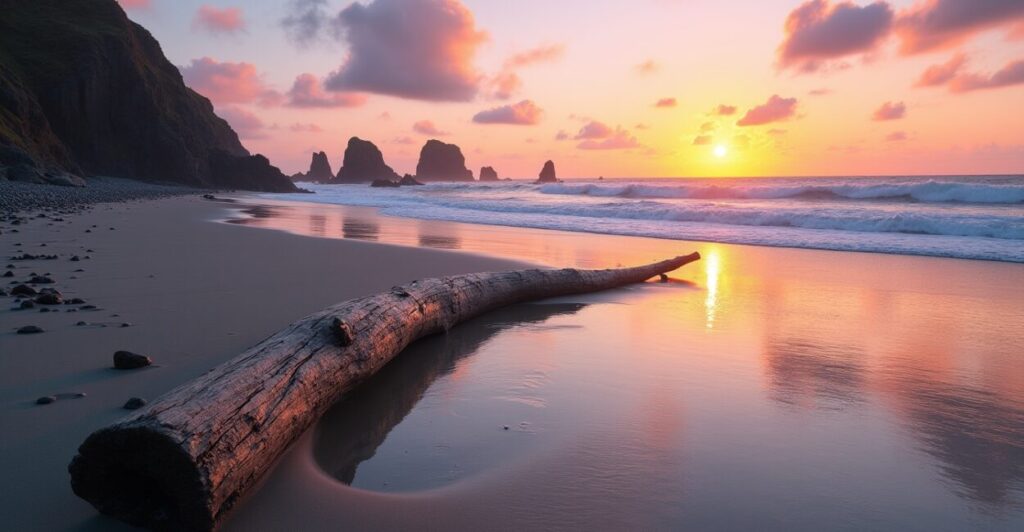
Place an interesting foreground element—rock, driftwood, or wet sand reflections—to lead the eye toward the glowing horizon. Keep horizons low for dramatic skies.
Layering midground subjects anchors scale, while the horizon’s placement dictates whether the image feels expansive or intimate.
Using Motion and Reflections
Include motion—waves, birds, or walking figures—to add narrative. Slow shutter speeds blur water, creating painterly foregrounds that contrast crisp, sunlit highlights.
Wet sand or tide pools mirror the warm sky, doubling color and creating powerful symmetry for striking compositions.
Best St. Lucia Beaches for Dawn Contrast and Saturated Skies
Where to Position for Dramatic Backlight
Choose beaches facing the rising sun for strong backlight. On St. Lucia, east-facing coves capture dawn glow with saturated clouds and long, cinematic shadows.
Scout points that include palm silhouettes, volcanic rocks, or jetties to break the horizon and add scale.
Local Weather Patterns and Timing
Dawn clarity often follows calm nights. Aim to arrive 30–45 minutes before sunrise to capture predawn color shifts and the first warm rays kissing the shore.
Check local tide charts—low tide exposes reflective sand and tidal pools, enhancing color contrast and foreground interest.
| Beach | Best light | Key features |
|---|---|---|
| Reduit Beach | Dawn backlight | Long sand, palm silhouettes, calm water |
| Marigot Bay | Sunrise reflections | Protected cove, colorful clouds, boats |
| Rodney Bay | Warm horizon hues | Promenade access, tidal pools, rocks |
Practical Morning Routine: a Step-by-step Golden Hour Workflow
Prep, Travel, and Arrival
Scout locations the day before and pack essentials—batteries, cards, tripod, and filters. Aim to minimize setup time at dawn when light changes rapidly.
Arrive early to reposition for unexpected cloud formations and to catch the subtle pre-dawn colors that often surprise photographers.
Featured Quick Workflow
- Scout composition and set tripod firmly on stable sand or rock.
- Meter for highlights and bracket three exposures for safety.
- Shoot RAW with manual or aperture-priority settings for control.
- Capture motion with varied shutter speeds for texture and drama.
- Review frames quickly, adjust composition, then continue shooting.
Post-processing Tips to Amplify Warm, Cinematic Tones
Color Grading and Contrast
Lift shadows slightly and add warmth via temperature sliders. Use HSL adjustments to boost oranges and deepen teal in skies for complementary contrast.
Apply gentle curves for filmic contrast and use split toning to emphasize warm highlights and cool shadows subtly.
Retouching and Preserving Realism
Remove distractions and enhance local contrast selectively to preserve natural texture. Avoid oversaturation—aim for cinematic, not synthetic results.
Use graduated filters and selective dodging to guide the viewer’s eye toward the brightest, most emotive parts of the frame.
Ethics, Safety, and Respectful Travel During Golden Hour Shoots
Respect Local Communities and Wildlife
Arrive quietly, avoid disturbing nesting birds, and follow local guidance. Golden hour often overlaps with sensitive wildlife activity—prioritize minimal impact.
Be polite with local residents and obtain permission before photographing people close up; reciprocity builds trust and authentic stories.
Personal Safety and Gear Care
Dawn can be humid and slippery. Wear sturdy shoes, protect gear from salt spray with covers, and lock your vehicle when leaving equipment unattended.
Bring a headlamp for safe navigation and a waterproof bag for unexpected weather shifts in coastal environments.
Conclusion
Golden hour is where light becomes storytelling: warm tones, long shadows, and saturated skies turn ordinary scenes into cinematic moments. From gear and composition to St. Lucia’s dawn beaches, you now have a practical roadmap to capture emotive, high-contrast imagery. Return to the first mental image you created—arrive early, look for reflections, and let the golden hour do the storytelling for you.
Faq
When is the Golden Hour and How Long Does It Last?
The golden hour typically occurs shortly after sunrise and before sunset when the sun sits low on the horizon, producing warm, directional light. Its exact duration varies by latitude and season, often lasting 30–90 minutes. Near the equator, transitions are faster; at higher latitudes, golden hour can stretch longer, offering extended shooting opportunities and richer color development for landscapes and portraits.
What Camera Settings Work Best During Golden Hour?
Optimal settings start with shooting RAW, using a moderate aperture for depth of field, and adjusting ISO to maintain clean images. Manual exposure or aperture-priority helps control depth; underexpose slightly to preserve highlights. Bracketing exposures safeguards detail in extreme contrast scenes and tripod use enables long exposures for creative water motion effects and crisp silhouettes.
How Can I Capture Saturated Skies at St. Lucia Beaches During Dawn?
To maximize saturated skies, arrive before sunrise, use a polariser to deepen blues, and expose to retain highlight detail. Include reflective foregrounds like wet sand or tidal pools to amplify color. Scout east-facing coves on St. Lucia for direct dawn light; bracket exposures and blend in postproduction to recover dynamic range and enhance cinematic color without overprocessing.
Which Lenses Are Recommended for Cinematic Golden Hour Shots?
Wide-angle lenses capture expansive skies and foreground drama, while fast primes (35mm, 50mm, 85mm) deliver creamy bokeh and low-light performance for portraits. A telephoto compresses distant clouds and isolates subjects against glowing horizons. Bring a versatile zoom if you prefer flexibility, and consider primes for sharper, characterful rendering during low-light golden hour sessions.
How Should I Balance Authenticity and Post-processing for Golden Hour Images?
Preserve the scene’s natural mood by prioritizing RAW capture and subtle, deliberate edits. Boost warmth and contrast modestly, adjust HSL to emphasize oranges and teals, and use selective adjustments to guide the eye. Avoid heavy saturation and unrealistic color shifts; aim for cinematic polish that reflects what you saw while enhancing emotional resonance without betraying authenticity.
Further reading: check technique guides from National Geographic Photography and local travel notes at Lonely Planet – St. Lucia for weather and access tips.