


The Northern Lights draw us north with a promise of emerald curtains and electric skies. This guide explains what the Northern Lights are, why Orkney is a unique vantage point, and how to prepare for aurora flares using shorter exposures, a tracker, and pre-tested ISO settings.
Expect clear, mobile-friendly advice for aurora photography, practical camera settings, and safety tips. You’ll learn field-tested tactics to capture dramatic aurora borealis over the Orkney Islands during geomagnetic storms and peak activity nights.
Read on to find step-by-step preparation, exposure strategies, and tracker use that keep your shots sharp and vivid during unpredictable aurora displays.
Why Orkney is Special for the Northern Lights
Remote Skies and Low Light Pollution
Orkney’s remote location offers dark skies ideal for aurora photography and astrophotography. Reduced light pollution enhances color, contrast, and visibility of faint auroral structures.
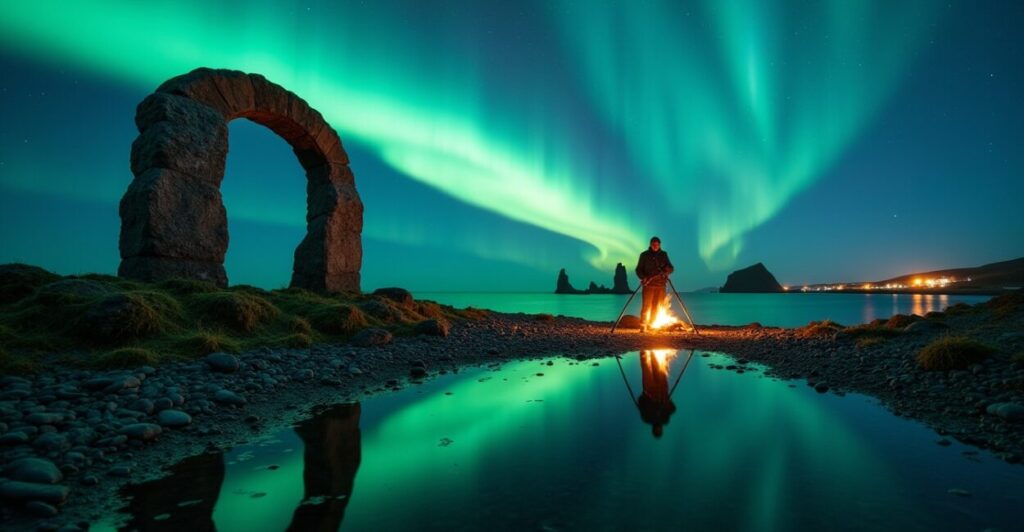
Clear coastal horizons let you frame the aurora with sea, cliffs, and stone circles, increasing composition options for memorable northern sky images.
Latitude, Geomagnetic Storms, and Viewing Windows
Orkney’s latitude increases odds during geomagnetic storms and aurora forecasts. Higher Kp index events push the aurora further south, lighting the northern sky.
Monitor space weather, solar wind speed, and aurora forecasts to catch peak activity nights. Timing is everything for bright aurora displays.
Camera Kit and Tracker Choices for Aurora Photography
Essential Camera and Lens Selection
Choose a wide-aperture lens (f/2.8 or faster) and full-frame or high-performing crop sensor to reduce noise. Fast glass and sturdy tripod are non-negotiable.
Bring spare batteries, memory cards, and a remote release. Cold nights drain power quickly, so keep spares warm in an inner pocket.
Tracker Benefits and When to Use One
A star tracker lets you use longer exposures without star trails, revealing finer aurora detail and subtle colors. It’s ideal for dim, slow-moving displays and high-resolution frames.
For rapid, shimmering aurora flares, shorter exposures may be better even with a tracker. Balance exposure length with aurora motion and tracker alignment needs.
- Pack lightweight but robust support for remote terrain.
- Prefer manual-focus lenses and learn to focus in the dark.
- Practice tracker alignment at home to save time on location.

Exposure, Iso, and Shutter Strategies for Aurora Flares
Shorter Exposures to Freeze Fast Aurora Motion
Fast aurora flares can blur if exposures run too long. Shorter shutter speeds (1–5 seconds) freeze structure and keep stars sharp without trails.
Use a wider aperture and slightly higher ISO to compensate. Test ISO range beforehand to find acceptable noise levels for your camera.
Pre-testing Iso and Balancing Noise
Test ISO settings on a few trial nights before peak activity. Note noise patterns, color shifts, and usable shutter speed at each ISO level for your camera.
Keep ISO as low as possible while preserving desired shutter speed. Modern cameras handle ISO 1600–3200 well; older models may require lower targets.
Field Workflow: from Forecast to Final Shot
Check Forecasts, Charge Batteries, and Scout Locations
Start with aurora forecasts, local weather, and cloud coverage. Pick scouting sites with clear northern horizons and minimal artificial light.
Arrive early to set up, test focus and compositions, and run exposure tests. A calm, methodical approach improves your odds during sudden flares.
Real-time Adjustments and Exposure Bracketing
During active displays, adjust shutter speed in small increments to freeze motion. Use burst mode for rapid-fire capture of unpredictable structures and color shifts.
Bracket exposures or shoot RAW to preserve highlight and color detail for post-processing. Keep metadata and notes for each sequence for consistent edits.
| Condition | Recommended Shutter | Suggested ISO |
|---|---|---|
| Fast flares, bright | 0.5–2s | 800–1600 |
| Moderate aurora, medium speed | 2–8s | 800–3200 |
| Dim, slow aurora with tracker | 10–120s (tracked) | 400–1600 |
| Static nightscape (no aurora) | 10–30s | 100–800 |
- Check aurora forecasts and local weather before leaving.
- Set up tripod and tracker; polar-align quickly and accurately.
- Test focus at infinity and take exposure test frames.
- Adjust shutter speed to freeze motion; increase ISO only as needed.
- Shoot bursts during rapid changes; review histograms and adjust.
Composition Tips: Foregrounds, Reflections, and Storytelling
Use Orkney Landmarks to Anchor Shots
Frame the Northern Lights with stone circles, sea stacks, or coastal villages for scale and emotion. Foreground anchors create narrative depth in aurora images.
Include human elements sparingly for scale—silhouettes, campfires, or photographers at work deliver emotional resonance.
Water Reflections and Symmetry
Calm water doubles aurora drama with mirror reflections. Find sheltered bays or tidal pools for symmetrical compositions and richer color interplay.
Plan for tide times and access to safe vantage points. Reflections work best during low wind and clear skies.
- Scout foregrounds during daylight to plan compositions.
- Use long lenses for compressed perspective, wide glass to include landscape.
- Balance sky and foreground exposure using graduated approaches in post.
Processing Aurora Photos: Color, Noise, and Authenticity
Raw Processing and White Balance
Shoot RAW to recover color and dynamic range. Tweak white balance to cool or warm tones while preserving the aurora’s natural greens and reds.
Avoid over-saturating—aim for believable luminescence that reflects the emotional memory of the night.
Noise Reduction and Preserving Detail
Apply targeted noise reduction in dark areas while protecting edges. Use stacking techniques for tracked long exposures to lower noise and raise detail.
Combine short-exposure sequences for sharp stars with longer tracked frames for faint aurora to create balanced final images.
Safety, Ethics, and Local Respect in Orkney
Stay Safe in Cold, Remote Terrain
Prepare for rapidly changing weather, cold temperatures, and remote access. Carry warm layers, headlamps, and navigation tools for safe returns.
Share location details with someone and know local emergency contacts. Responsible planning keeps you and the landscape safe during night shoots.
Respect Wildlife and Local Communities
Avoid disturbing wildlife and private property. Be considerate of local residents, especially in small Orkney settlements where noise and light matter.
Follow Leave No Trace practices and pack out all waste. Ethical behavior protects access and preserves skies for future aurora watchers.
Conclusion
Mastering the Northern Lights over Orkney is about preparation, rapid response, and creative composition. Use shorter exposures to freeze fast flares, a tracker for detailed slow displays, and pre-tested ISO settings to balance noise and clarity.
Return to the opening promise: with forecast awareness, careful kit choices, and field-tested workflows, you’ll capture auroral moments that feel as alive as the sky felt that night.
Faq
When is the Best Time to Photograph the Northern Lights in Orkney?
The optimal season runs from late autumn to early spring when nights are darkest and skies are clearest. Peak geomagnetic activity hazards can occur year-round, but winter months offer longer observation windows. Track aurora forecasts and local weather; aim for dark, moonless nights and low cloud cover to maximize visibility and color intensity.
Should I Use a Star Tracker or Shorter Exposures for Aurora Flares?
Use a tracker for long, slow auroras to capture faint detail without star trails. For rapid aurora flares, prefer shorter exposures (sub-5 seconds) to freeze motion. Combine both approaches: tracked frames for subtle structure and short bursts to capture fast-moving dynamics for compositing later.
How Do I Test Iso Settings Effectively Before Peak Nights?
Run controlled tests at home or during clear evenings: shoot identical compositions at varying ISO values, apertures, and shutter speeds. Compare noise, color fidelity, and usable shutter durations. Note thresholds for acceptable noise so you can dial ISO quickly on active nights without guessing in the cold.
What Safety Precautions Should I Take When Shooting Aurora in Orkney?
Dress in layers, protect batteries from cold, and carry navigation tools and a headlamp. Check tides and terrain to avoid hazards near cliffs and shorelines. Inform someone of your plans and expected return; remote night shoots demand contingency planning and respect for local rules and wildlife.
Where Can I Find Reliable Aurora and Space Weather Forecasts for Planning?
Use official and community-driven sources like the UK Met Office, NOAA’s Space Weather Prediction Center, and AuroraWatch UK for alerts. Combine Kp index forecasts, solar wind data, and local cloud predictions to choose nights with high probability of visible Northern Lights, especially for Orkney viewings.
Further reading: NASA’s Space Weather Center (swpc.noaa.gov) and AuroraWatch UK (aurorawatch.lancs.ac.uk) offer reliable forecasts and alerts.